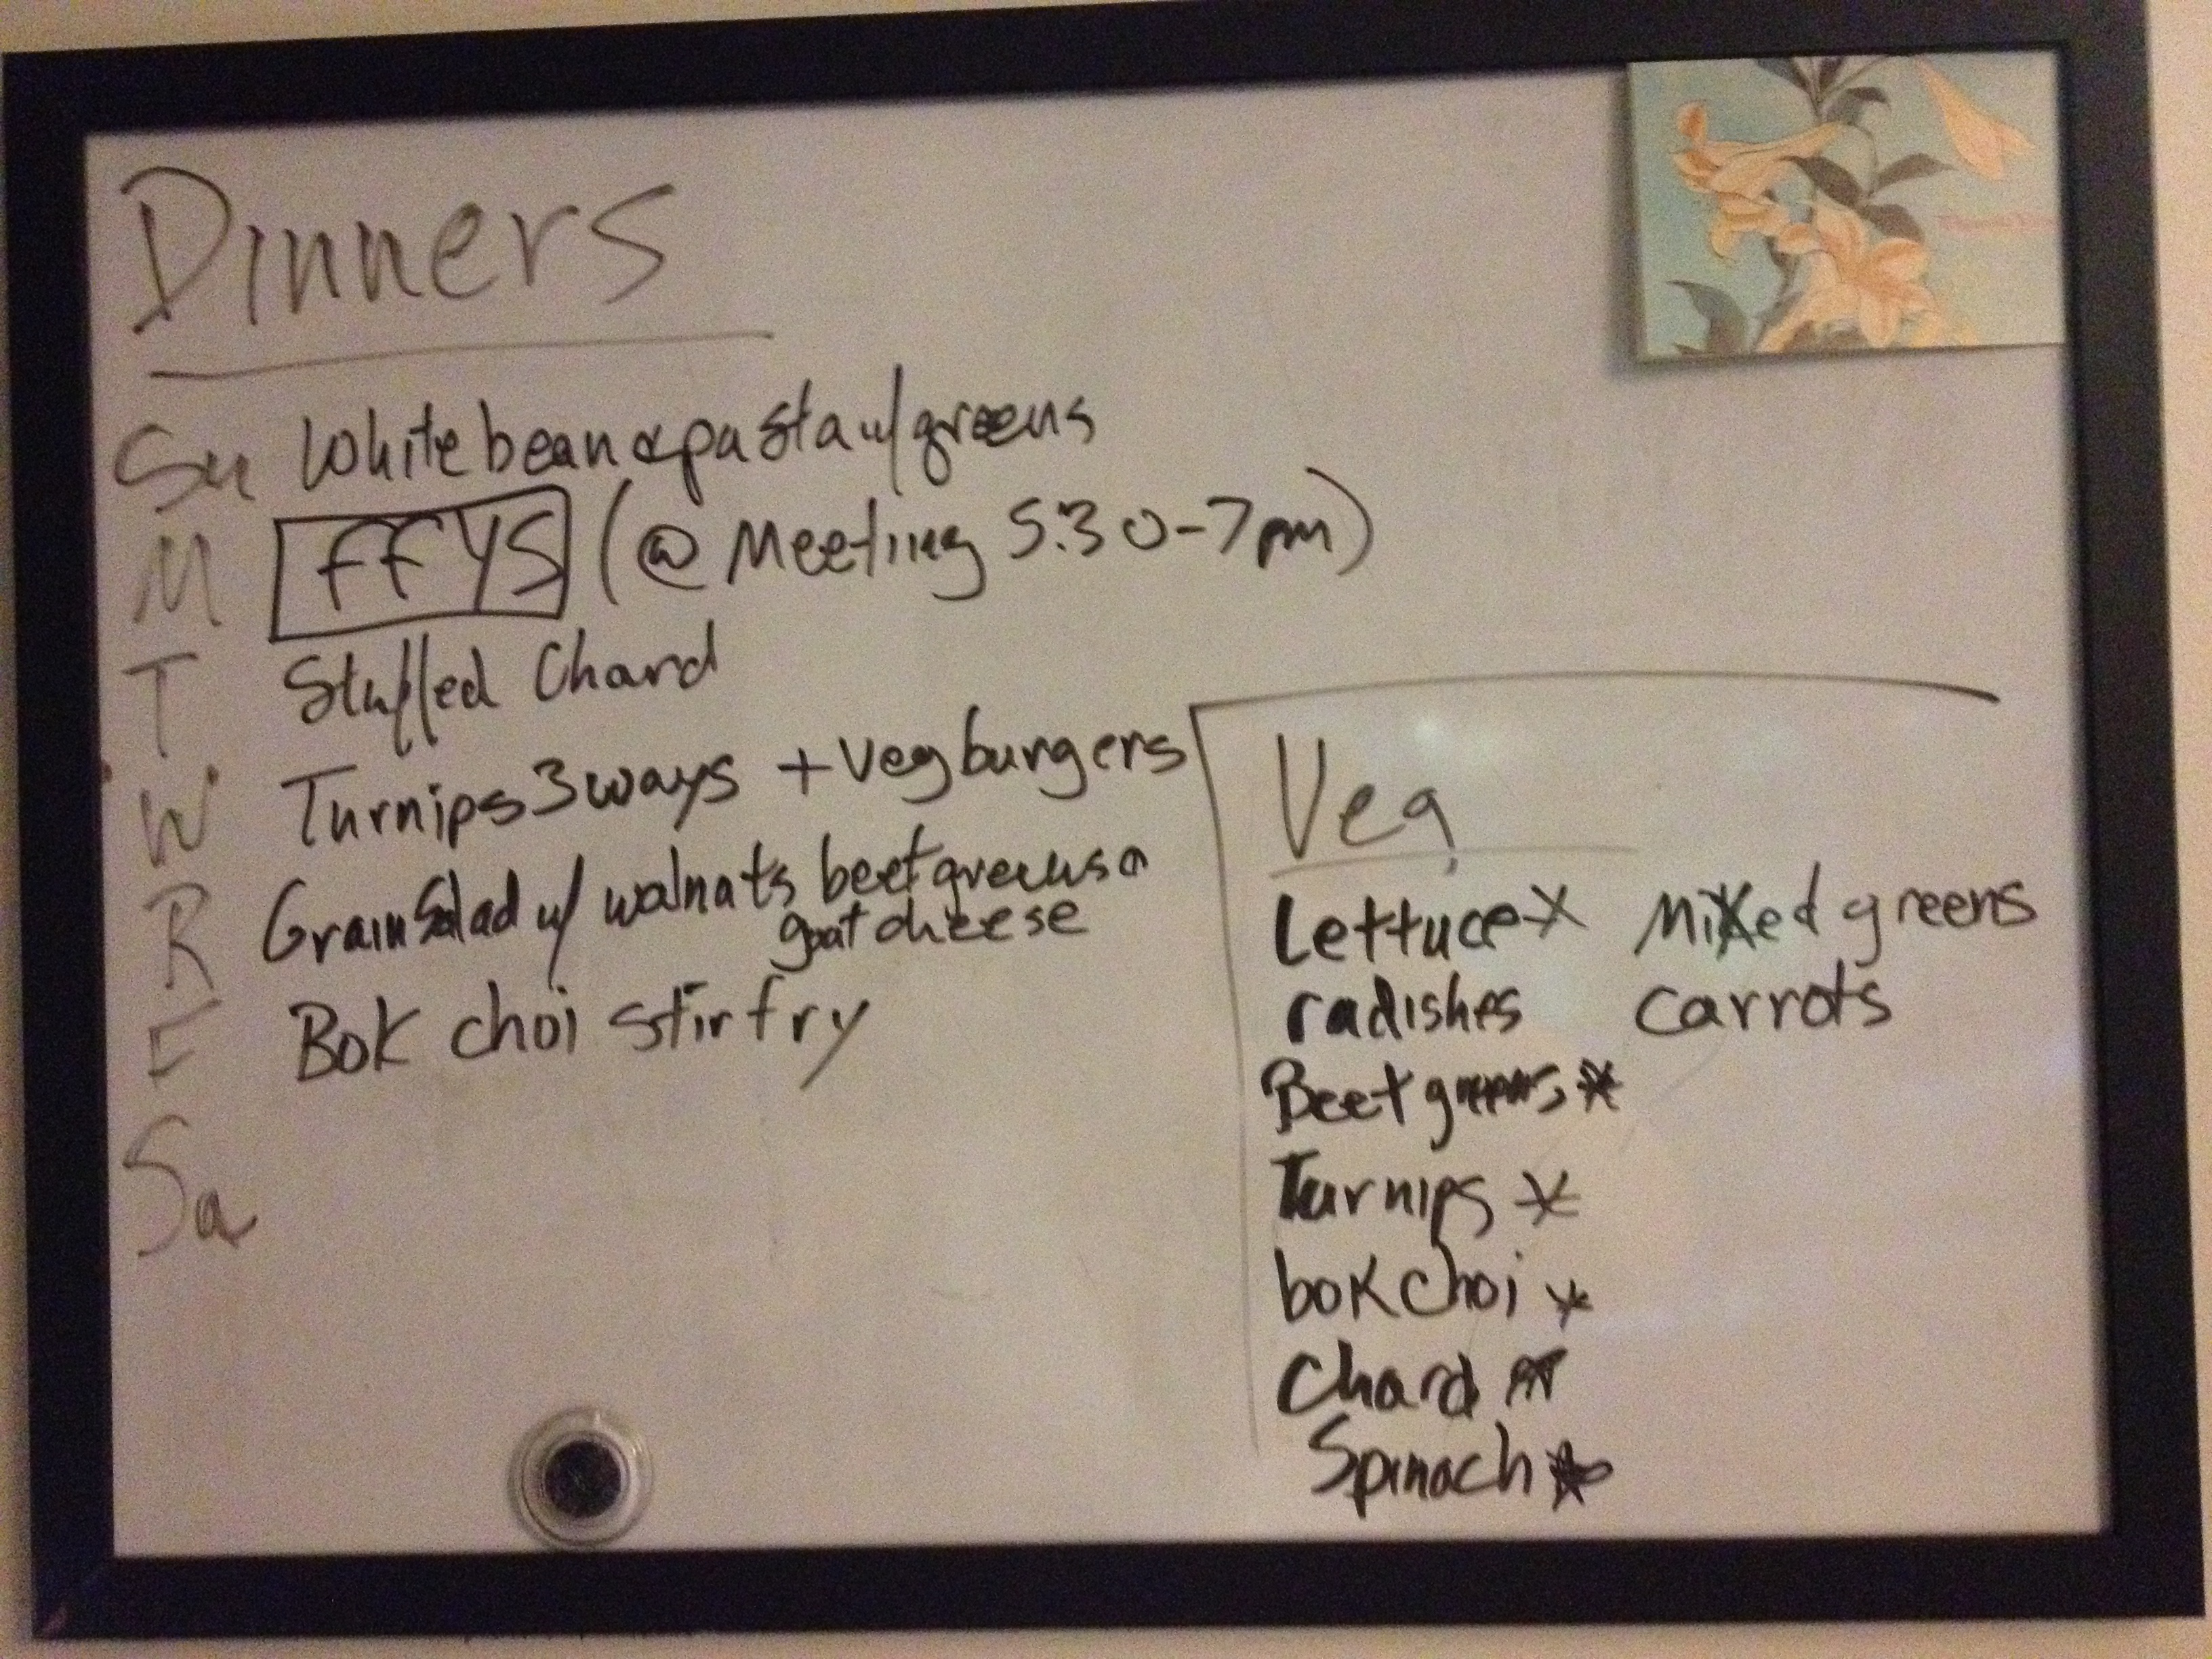
The dinner board lists the veg on hand and the dinners we’ll make with it (I hope). I star the veg that’s going to be used in a specific recipe. FFYS means “fend for yourself”-and means that neither of us are availble to cook that night.
Each week, I strive to look over our store of vegetables and draw up a menu for our dinners. It helps me to focus my grocery and farmer’s market purchases, plus, as I’m walking home from work, I can go over the plans for dinner and be ready to prep when I walk in the door (or after Pidi and I get home from the Dog Park.) As you can see from the board, Sunday night’s dinner was supposed to be “white ends & pasta w/greens” and since it’s Sam’s day off work, he was planning on cooking. He asked me for the recipe, but I realized I had never written this recipe down anywhere. I put pen to paper (figuratively), so Sam didn’t have to develop his psychic abilities to cook recipes that I’ve made up and never written down…

Frisee-style Escarole (via OneDropDream) Escarole (Via InMyBox.Wordpress.com)
Escarole is a fleshy lettuce with a mild, bitter taste and is very similar (indistinguishable, I think) from endive. Sometimes, sadistic farmers grow “chicories,” blanched plants that are forced to grow into tight pointed heads. All of these veg – escarole, endive, chicories – are part of the family of Italian cooking greens. For people who don’t like cooked lettuce, think of fleshy Italian cooking greens more like spinach or kale – greens that we cook without batting an eyelash – instead of like lettuce.
Not knowing what to do with escarole, a few years ago, I turned to Farmer John’s The Real Dirt on Vegetables that recommended cooking escarole with pasta in olive oil with garlic, and to Alice Waters who has a recipe for greens and white beans in her Chez Panisse Vegetables cookbook (repo@Serious Eats). I combined the two – because who doesn’t like beans and pasta?
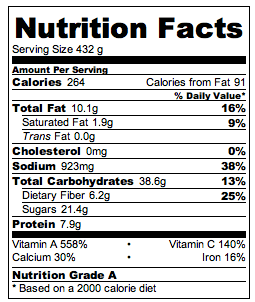
White beans and escarole with pasta
- 1 head of escarole (see the picture above for sizing)
- 14.5 oz can of small white beans, great northern beans, white kidney beans or cannelloni*
- 1 pound small pasta that cook up to be about the same size as a bean**
- 3-4 garlic scapes
- olive oil
- salt and pepper
- 1/4 cup heavy cream (optional)
- Shaved parmesan (optional)
*I’ve tried this with dried beans, and you need the thick bean broth from the canned beans to form the basis of the sauce. Don’t try it with dried beans.
**Ditalini is the perfect pasta for this dish since it cooks up to the same size as a bean, but it’s hard to find. Alternatives are rotini, penne, cut spaghetti or elbow macaroni.
Prep
- Wash and dry the escarole and chop or tear it into 2″ pieces. Taste the core and make sure it’s not terribly bitter before including it.
- Mince the garlic scapes, omitting the tip of the scape, if dry, and the neck where the scape bulbs into a spade shape.
Cook
- Boil water with salt, and cook the pasta until al dente.
- While the pasta cooks, heat 1-2 tbsp olive oil in a large skillet over medium heat.
- Add the scapes and cook for a minute until they’re soft.
- Add the escarole and turn in the olive oil to wilt. If it won’t all fit in the pan (often it doesn’t…) steam the greens by adding all of the escarole to the pan and 2 tbsp water. When it steams, cover the pan for 1-2 minutes until the escarole has wilted and is more manageable. Turn the escarole in the oil to mix around the flavor.
- Open the can of beans and pour the whole can, bean sauce and all, into the skillet. Bring the beans and greens to a simmer. Reduce the heat to low and cook until the pasta is done.
- Before draining the pasta, reserve a cup of the cooking liquid. This will CYA if there isn’t enough bean juice to coat the pasta and you have to thin it out a little bit.
- If the skillet will hold it, add the pasta into the skillet and cook for another minute or two. Otherwise, return the pasta to the pot, and use the heat of the pot to dry off the extra moisture. Add the contents of the skillet and mix. If there’s not enough sauce, thin it out a bit with the reserved cooking liquid.
- Taste and adjust the salt and pepper. If you like the dairy thing (this recipe is vegan up until this point), take the pan off the heat and stir in cream.
- Top with shaved parmesan, if you like the dairy thing… Parmesan is salty, so don’t over-salt the dish.