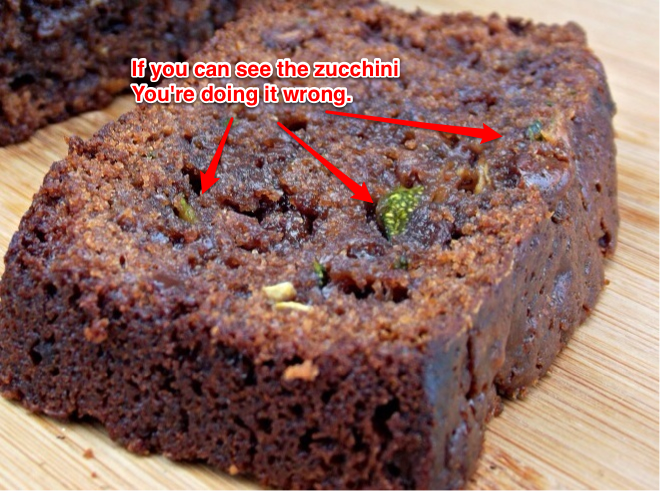
Do you really have any zucchini left after all of these recipes? This is the BEST way to hide zucchini. You’ll never know it’s there… And POOF! Two zucchini will disappear without a trace.
(Dry)
2 cups all-purpose flour
1/2 cup unsweetened cocoa powder
1 teaspoon baking soda
1/2 teaspoon baking powder
1/2 teaspoon salt
(Wet)
1/2 cup unsalted butter
1 cup light brown sugar
1 teaspoon pure vanilla extract
1 teaspoon instant coffee granules
3 large eggs
(Other)
2 cups unpeeled grated zucchini, from about 1 1/2 medium zucchini
5 2/3 oz bittersweet chocolate, chopped
Heat the oven to 350F. Grease a 9″ round or square cake pan.
Whisk together dry ingredients: flour, cocoa, soda, powder, salt.
In the stand mixer, beat butter and sugar until light and fluffy. Add eggs, one at a time, then add Vanilla and coffee.
Combine the zucchini, chopped chocolate, and a third of the dry ingredients, making sure the zucchini strands are coated with flour.
Add the remaining dry ingredients into the wet. Keep the stand mixer on low to avoid a big mess.
Remove the bowl from the mixer. By hand, fold together the zucchini into the batter until just combined.
Pour into the cake pan and spread out flat.
Bake 45 mins, or until a probe comes out clean. Let cool.
Now, if you really need to get rid of some zucchini make two cakes, then make zucchini lemon curd, and chocolate frosting. Now ou you’ve used up about 5 zucchini!
After all of this, do you really still have zucchini left???
This is a variant on the spaghetti-based Italian Fritatta.
2 to 3 medium, 1 to 2 large, or 1 jumbo zucchini
4 to 6 eggs
1 cup grated cheese like parmesan or cheddar
2 tbsp Butter or oil
Garlic or onion powder
Heat the oven to 400F and place a 10 to 12 inch cast iron skillet in in the oven to get hot.
Run the zucchini through the mandoline and cut into long julienne strips. If you don’t have a mandoline, cut into uniform slices, then cross-cut into julienne strips or grate the zucchini. Toss the zucchini with salt and pepper, garlic or onion powder, and 1/3 cup of grated cheese. Beat the eggs.
Once the oven is hot, add butter or oil to the hot skillet and swirl to coat the bottom. Remove the skillet from the oven and loosely pile the zucchini in the hot skillet. Return to the oven and cook for 8-12 minutes until the zucchini smells toasted and fragrant. Remove the skillet again from the oven and pour the eggs over the zucchini. Cook another 8-12 minutes until the center of the eggs are firm. Top with 2/3 cup of cheese and cook about 5 minutes longer, until the cheese is brown and bubbly.
Remove from the oven and let set for 5 minutes to firm up. Slice into wedges.
Late August is the only time that New Englanders lock their car doors. If you leave your car unlocked, somebody will leave you a box of orphan zucchini on your front seat. (Photo from greenstag.net)
We have the first week of our CSA where we don’t have lettuce and do have more zucchini (and other summer squash) than we expect to eat in a week. This marks a big move in our Summer eating. Up until this point, we have new vegetables trickling in for the first time – the first cucumber, the first tomato, the first zucchini. We’ve now reached the peak of novelty and descended into bounty. We must smash tomatoes into jars because there are just too many to eat. The cucumbers get huge, bitter, and neglected on the vine. The lettuce, spinach and other greens have gone to seed and are bitter and inedible. We now have to hide zucchini in other foods. We now move into crisis mode. There are vegetables coming out our ears.
I have a lot of strategies for handling the bounty. Of course, you’ve read about my adventures with canning, drying, and other odd types of preserving. I also have strategic approaches for cooking that use up lots of vegetables. I went through some of my recipes for using lots and lots of greens, and now over the next few days, I will let you in on my secrets on how to cook a lot of zucchini.
Yes, I will share my recipe for chocolate zucchini cake.
During the hands-on portion of the workshop we made a mixed vegetable ferment with carrots, napa cabbage, radishes, salad turnips and onions. The onions came to dominate the flavor but have mellowed out while fermenting.
After chopping the vegetables and adding salt, the next step is to macerate the veggies to release juices and start the fermenting. This wooden macerator was handmade by a workshop attendee and the weight of the wood made quick work of macerating the vegetables.
Sandor Katz and a vat of homemade blueberry soda.
On Jul 22-23 I participated in a Fermenting workshop with Sandor Katz, the author of The Art of Fermentation and Wild Fermentation. Shelburne Farms, just outside Burlington, Vermont hosted the event. If you’ve been to Shelburne Farms before, we were in the Coach Barn for the event. Over two days we covered the basics of fermenting, lactic-acid fermentation of vegetables, a hands-on exercise making our own ferment, (day 2) dairy fermentation, fermenting grains and legumes, and fermented beverages like kombucha.
In general, I was impressed with Mr. Katz knowledge and experience with fermenting. He clearly has a passion for the art and has experimented with a lot of interesting techniques. Admittedly, that was where my enthusiasm stopped. Sorry to drag work into my blog, but I was criticizing Mr. Katz classroom technique throughout the workshop and found his teaching to be lacking. The entire second day was blocked out into 2-hour chunks with 30, 60, and 30 minute breaks between (8 hour day total). Most of the content was basic lecture with a few quick demonstrations (blueberry soda and yogurt). We had a hands-on activity after lunch on day 1, but day 2 was uninterrupted sitting. To compound the fatigue from sitting, the space had uncomfortable chairs and was not air-conditioned. We were pretty short tempered and sweaty in a 90+ degree room with little moving air. I didn’t get much out of the second day, even when I abandoned my uncomfortable chair to stand in the back of the room and hope to catch a little breeze. I did learn a lot, and the course definitely met my objective of motivating me to make better kraut and kimchee. I think I may even start to make our own yogurt.
I had three major takeaways from the event:
Everything is rotting, being digested and broken down by microbes. Fermenting is just using different techniques to control the process of rotting food by favoring different microbes over others. Malted barley plus water makes sugars that can be digested by yeast to make alcoholic beer, or by other molds to make nasty undrinkable stank.
Fermenting refers to two different processes. Process 1 is where yeast convert sugar to alcohol in the presence of oxygen, then acetobacteria convert alcohol to acetic acid (vinegar), again, still with oxygen. Process 2 is where lactic acid bacteria convert carbohydrates and sugars to lactic acid in the absence of oxygen. The following table may help clarify the difference between the two foods:
Process 1
Process 2
Microbe
Yeast
Lactic Acid Bacteria
Substrate
Sugar
Carbohydrates and Sugar
Oxygen
Present
Absent
Byproduct
Alcohol + CO2
Lactic Acid + CO2
Secondary Process
Acetobacteria convert
alcohol to vinegar
Food Characteristics
Alcoholic, Bubbly
Tart, tangy, softer
Tasty Examples
Beer, Wine
Sauerkraut, Yogurt
Fermentation has become very “faddish” due to confusion and misinformation about the well-supported versus not-so-well supported benefits of fermentation. Fermentation has three well-known and supported benefits: pre-digestion of food, preservation of unstable foods, and increased diversity of gut flora. With pre-digestion, the bacteria or yeast break down the substances in the food into simpler forms. Complex carbohydrates (e.g. cell walls) become simple carbohydrates (sugars), and complex sugars (disaccharides like sucrose or lactose) become simple sugars (monosaccharides like fructose or glucose). Fermented foods are more stable over time – sauerkraut lasts longer than a plain cabbage, and yogurt lasts longer than milk. Additionally, fermented foods are home to a culture of microbes that have been shown to have benefits for diseases of the gut.The confusion comes from the secondary effects. In the process of fermenting foods, some people argue that the food becomes more nutritious, makes certain nutrients more available for the body to absorb, and may have broader effects on the whole immune system of the body. Some participants at the workshop even argued (from their own personal experience) that fermented foods helped them recover from cancer, HIV, and other serious diseases. While these are nice stories to tell, the research just doesn’t pan out to support these effects. I’m working on a systematic review of the literature and when it gets complete, I’m happy to provide detailed citations. In the few areas where there have been studies, the studies have been small and results are non-conclusive. In the absence of good evidence, it’s fine to eat fermented foods because you like to eat them and drink them, but don’t do it because you think it will be some health panacea. It’s just a fad.
I know them’s fightin’ words, so please give feedback in the comments.
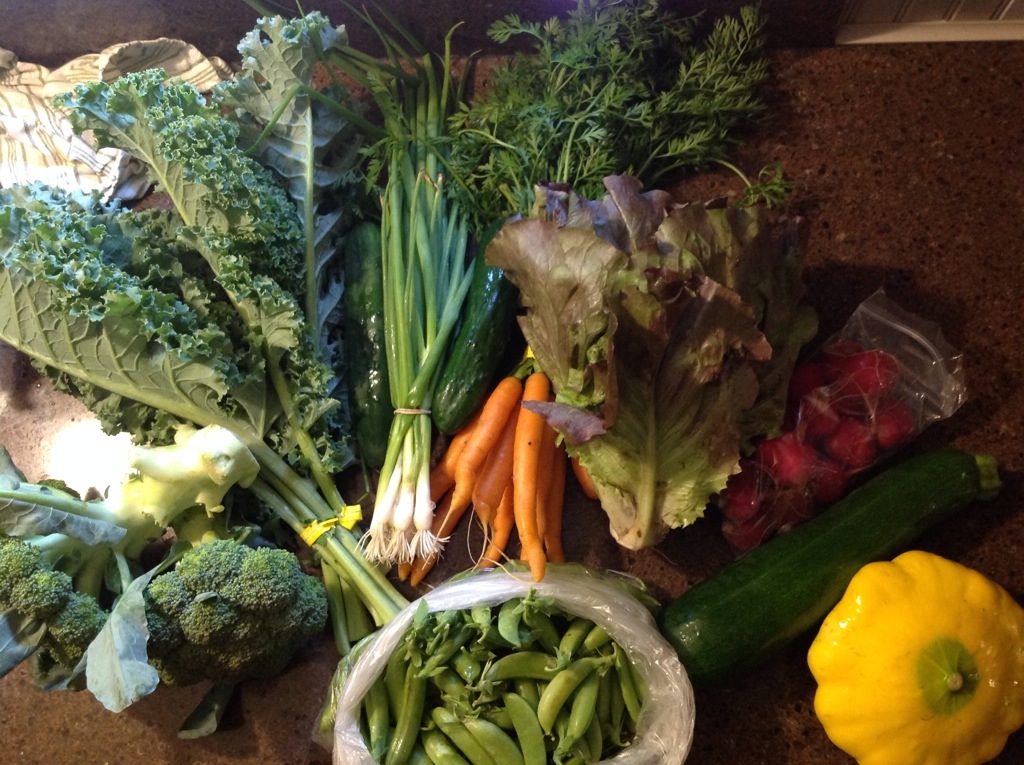
When talking with my non-– CSA friends about joining a CSA, one of the first concerns that comes up is, “how do you eat all of those vegetables?”
My answer? We don’t.
Sure, we do eat a good portion of these vegetables, or else we wouldn’t have joined the CSA. But, honestly, there’s a lot of things that still will turn bad in the bottom of our refrigerator. Arugula and red lettuce are common culprits. We don’t sweat it, we have a compost pile. The food isn’t “going to waste”, we’re making fertilizer for next year’s garden.
But only about 5% of our CSA box will go bad. That’s because I often anticipate foods that we might not eat, and I’ll either find a special recipe to use with that vegetable, like I did with the pesto and arugula. Alternatively, some of the foods we put away to eat in the winter. This week, we received a large head of broccoli. Broccoli is really easy to blanch and freeze, and we eat it all throughout the winter in different dishes like stirfry and garbage rice. I know that the value of that broccoli will be greater to me in November or March then it will be this week. So, into the freezer it goes.
Last, I know there’s some vegetables that we just don’t eat in our house. Eggplant is probably the best example. What I will do is leave the eggplant at the CSA pickup point. There’s often someone else there picking up their vegetables who might enjoy an eggplant which would otherwise just rot in my refrigerator. I also occasionally give away CSA vegetables to my friends and neighbors when we are really overwhelmed with too many vegetables.
So, when you look at these pictures and you think “how do you eat all of that?” We don’t. We have figured out how to cheat the CSA system so that we don’t have to eat all of those vegetables. But importantly we don’t let the vegetables go to waste.
It’s getting to be the time of the year when we’re a bit sick of all of the greens we’ve been eating while waiting for the summer vegetables to show up. My fridge seems to accumulate a lot of greens and we’re not the type of people to eat salads for three meals a day. I had to get creative and come up with some versatile recipes that use up a LOT of greens.
Some people suggest putting greens in your smoothies, and that’s a great way to get some veg at breakfast. However, I’m really not a fan of putting kale, turnip greens, arugula or other strongly-flavored greens into smoothies. Bananas and bitter sulfuric phytochemicals? Sounds nasty.
I typically use my greens up in one of the following three recipes:
I discovered years ago at Taco Bell that cooked lettuce is pretty disgusting. However, there are many more greens that are really delightful when cooked. Kale seems to be the fashionable green of the season, but spinach, turnip greens, arugula, “spicy mix” salad greens, dandelion greens and radish tops are also wonderful when cooked. However, that being said, it’s really easy to over cook greens into a disgusting blob of nastyness (think creamed spinach at a 24-hour buffet restaurant). Go easy on the heat and you can cook almost any green.
I have three different methods that I use to cook greens: the hot toss, the steam and the pourover. I think any types of greens will work with any method, but you might find ways that you like better.
Cooking Greens
Method 1 – The Hot Toss.
With the Hot Toss, you make a hot, fatty dressing and toss the greens to coat and wilt slightly.
1. Wash the greens, but leave a little moisture clinging to the leaves. It helps them cook faster.
2. Prep ingredients for the dressing. The recipe cooks quickly, so make sure to have everything set out and be ready to serve immediately. For a good hot toss, you need a very fatty dressing, so use a ratio of 4 parts fat to 1 part other stuff. Fats that work well are flavorful: butter, schmaltz, bacon grease or olive oil. For other stuff, use minced aromatics (garlic, onion, shallot), salty/umami tastes (soy sauce, anchovies, fish sauce), sweet flavors (sugar, honey, moleasses) or bitter/acidic tastes (prepared mustard, lemon/lime juice). Three combinations I like are:
zest of one lemon, 1 tbsp lemon juice, 1 tsp anchovy paste with 4 tbsp butter or olive oil. (especially tasty with Lacinato kale or dandelion greens.)
1 tsp minced garlic, 2 tsp soy sauce, 1 tsp chinese mustard with 3 tbsp vegetable oil and 1 tbsp sesame oil.
3. Heat the fat in a nonstick skillet. Cook the aromatics (if you’re using them) until soft. Add the other flavors and whisk to combine. (This is the “hot” part.)
4. (Here comes the “toss” part.) Take the pan off the heat and add about a third of the greens, using tongs to toss them with the hot dressing. Once those greens are wilted, add another third of the greens and keep tossing with the tongs. Once those greens are coated and just beginning to wilt, add the last third and toss briefly. If the greens aren’t wilting, you might need to put the pan back on low heat to keep the dressing hot. Serve immediately.
Method 2 – The Steam
With The Steam, you steam the greens until crisp-tender then combine at the end with a simple, light sauce.
1. Like above, wash the greens and leave a little water clinging.
2. Prepare ingredients for the dressing. Unlike the hot toss, the dressing should be mostly flavorful liquids, especially vinegars and chili sauces. You can use a little fat, but don’t use very much. I don’t often use aromatics either. For each combination, use about 3 parts liquid to 1 part other stuff.
3 tbsp rice wine vinegar and 1 tbsp chili garlic paste or a big squirt of sriracha
3 tbsp white wine and juice of one half of a lemon.
3. Heat the pan over medium-high heat. Add all of the greens in one giant pile. Pour the liquid (vinegar, mirin/water, or wine) over the top of the greens. Quickly cover with a tight-fitting lid. The liquid will turn to steam and cook the greens. After a minute, take off the lid and turn the greens with tongs, making sure everything is wilting. Thicker greens like kale or bok choi will take another minute to steam.
4. Once the greens are tender, turn off the heat, add the rest of the dressing ingredients and toss to coat.
Method 3 – The Pourover
With The Pourover, you make a super-rich sauce or dressing and pour it over the top of the arranged greens, letting the greens wilt with the heat and allowing lots of extra sauce to pool in the bottom of the serving dish. This ain’t healthy. Sorry.
1. Again, wash your greens. However, use the salad spinner or towels to get as much moisture off as possible.
2. Arrange your greens artfully in a serving bowl with a bottom well to collect extra sauce or dressing. You can add other salad fixings to this recipe too, making into more of a meal. Some possible additions: chopped boiled egg, bacon, croutons, finely shredded or julienne cut vegetables, green onions, etc…
3. Make a really unhealthy sauce. My favorites are:
bacon grease with salty beef boullon (use a cube) and cider vinegar
Burre Blanc (lemon-butter sauce. See Child, J. Mastering the Art of French Cooking vol 1, Chapter 1.)
Hollandaise sauce (see above, same chapter)
Basic mayo, heated gently.
4. Pour the really unhealthy sauce over the greens. Really pour a LOT of it over the top. The point is to drown the boring stuff in really tasty stuff. Be generous. Serve from the bowl, and use a big spoon to add any sauce or dressing from the bottom of the bowl back on top of the individual servings of greens.
My neighbor Cindy and I walk our dogs past this Orthodontist office that has an tree just hanging full of wonderful, ripe, flawless apples. Tasty apples, too – I’ve eaten a few that I could reach from the ground – Juicy and not too tart, with firm flesh. Just wonderful apples going to waste on the tree.
I vowed to steal them.
I figured there’s no orthodontist that sees patients on Saturdays – so I drove over in my car, parked under the tree and climbed onto the roof. Wouldn’t you know it, I could only reach a handful of apples. The fruit hung from the branch, just out of my reach. Many people would give up in defeat, but something about these apples lit a fire under my butt. I needed help and a way to reach the apples.
Pidi and I went to West Lebanon Feed and Supply to buy an Apple Picker. It’s a wire basket on the end of a pole with some rake-like fingers to pluck fruits from high up in the tree. I splurged the extra dollars to get the full 15′ model. I was going to get those damn apples come hell or high water. I called up Cindy and recruited her to my cause. Petty Crime and Free Apples. I mean, who doesn’t want that?
Evidence of the crime.
Now armed with implements and a co-conspirator, I load up the car and drive back to the Orthodontists office. I’m standing on the roof of my car and Cindy’s down on the ground unloading the apples from my picking basket into a bushel box. We have about half a bushel when up drives a guy in a black Porsche 911 from the 1970s. Instead of dropping the pole and running, I hopped off the roof of my car, walked up with a big smile and an armload of apples. I asked if he wants an apple. I ask if these are his apples. My heart is pounding in my chest.
The Porsche 911. The Orthodontist. Yes, I’m still standing on the roof of my car. Aren’t those great boots?
Turns out, this is the orthodontist who owns the apples we’re stealing. He also happens to be a very nice guy and willing to trade pie for calling the police. He needs to wash his Porsche, so decided to come over to his office where, I guess, all orthodontists keep power washers. Coincidence? I don’t think so. I suspect somebody tipped him off that there were hooligans stealing his apples. He seemed surprised to find reasonably nice people willing to pick his apples for him for free. What’s an orthodontist going to do with a bushel of apples? Kids in braces aren’t supposed to eat them…
Petty crime and free apples. I mean, who doesn’t want that?
We picked a bushel of apples off his tree over the course of an hour. The orthodontist power-washed his Porsche and we all went home happy.
The apples were beautiful. I had to throw out 3 of the whole bushel. I made applesauce and got about 12 pints. I felt guilty keeping all of these free apples for myself, so I left a pile on the stoop of the orthodontist’s office, gave a bunch to my neighbors, and sent Cindy home with a weeks’ worth of fruit. She was my co-conspirator…
I think I may recruit Sam to go with me to steal a few more… I’m craving an apple pie.