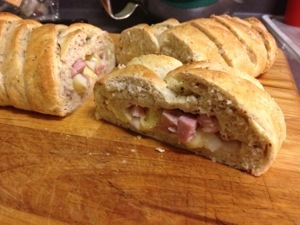
Four cookbooks. Cooks Illustrated Bound Annuals from 2001 and 2009. The Science of Good Cooking from Cooks Illustrated, 2012. How to Cook Everything (The Red Book) by Mark Bittman, 2008.
I made out like a bandit this Christmas for Cookbooks. Thanks to my husband, Sam and to my Mom for these most excellent reference books. I want to describe these books a little bit and give you a flavor of how I expect them to be useful in the future.

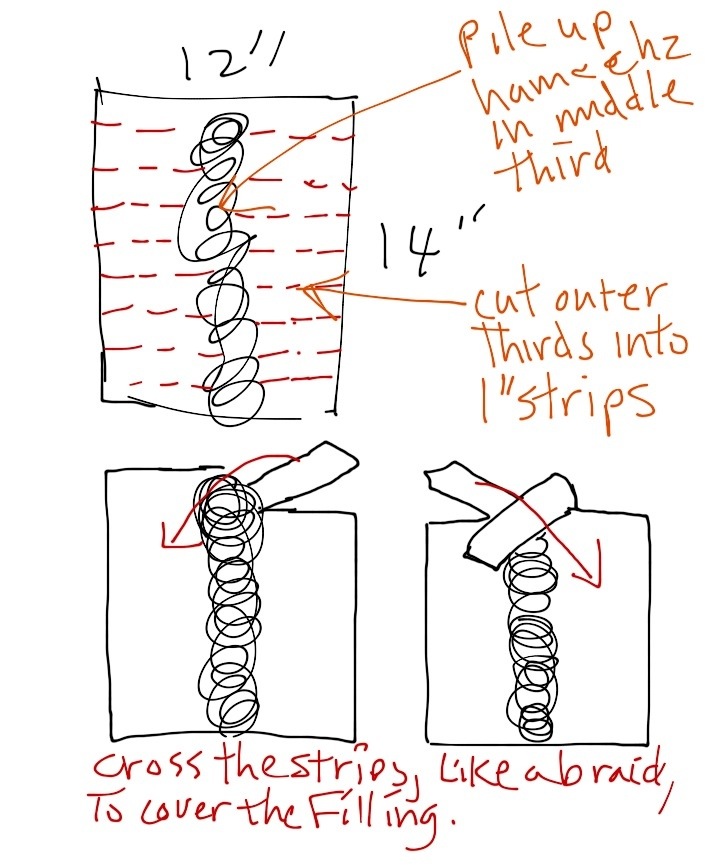
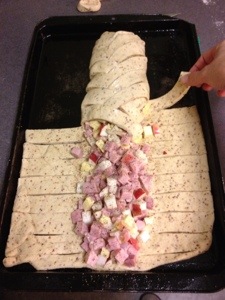
How to butterfly a chicken. From How to Cook Everything (the Red Book) by Mark Bittman, 2008. Illustrations by Alan Witschonke.
Bittman’s book, How to Cook Everything – I call it the Red Book – is the modern version of the original Fannie Farmer Boston Cooking School cookbook or the Betty Crocker cookbook. It’s the one book that a cook needs in order to make most every basic recipe. Bittman incorporates the international cooking style that has come to be known as “American” cooking – a little French, a little Italian, a little Asian, a little Middle-eastern, and a lot of reliance on equipment and seasonings. Bittman also gives ample space to specific techniques – Illustrated by Alan Witschonke in pen and ink. There’s none of the “food porn” photography. Not too many “weird” parts of animals. Not too many pointless variants on the same recipe. He avoids specialty ingredients like black garlic, san marzano tomatoes, etc, that clutter up recipes from famous Restaurant chefs. Want to make waffles? There’s a recipe. Want to cook black beans? There’s a recipe. Want to know how done to cook a chicken thigh? There’s a table. Want to know the correct ratio of fat to flour in a pie dough? Look it up. (although Barahm’s The Science of Cooking and Ruhlman’s Ratio to a better job). Just like Julia Child’s Mastering the Art of French Cooking, this cookbook will be a “sticky note” cookbook – meaning there are specific recipes that I frequently turn to as staples of my cookery.

Screen shot from the How to Cook Everything (The Red Book) for iPhone.
I originally found the Red Book by necessity. On my shelf I have one “generic” cookbook – Fanny Farmer’s Boston School Cookbook – and I find myself turning there (and to general internet searches) to find recipes for making “basic” stuff that I can’t just make up without a recipe. For example, I can bake an apple crumble without a recipe, just as long as I can remember the ratio of butter::nuts::oats::flour::sugar that goes into the topping. I don’t have any intuitive sense for how much water to use when cooking beans or grains, so I have to look it up each time. To me, it doesn’t matter what type of nuts or what type of sugar, what type of bean, or how much water… I just need a sense of how much to put together. Fanny Farmer is good for older types of cooking, like pie dough and sweet and sour cabbage, but is very lacking in newer American food trends. I had no idea how to make hummus… Fanny Farmer didn’t tell me much of anything and the internet was saturated with bad, unreliable and untested recipes. (I hate 99% of internet recipes… but that’s another tale… )I needed a cookbook that had recipes for basic but more modern foodstuffs.
I had been introduced to the Red Book a few years ago when learning how to poach an egg. Bittman gives plenty of time for technique on this basic “recipe” – add vinegar to the simmering water, crack the egg onto a plate to ease transition into the water, swirl the water to create a vortex for the egg, spoon water over the yolk to set it, trim off the threads. Does it count as a recipe when the ingredients are an egg, a splash of vinegar and water? Here the Red Book shines with excellent technique.
So, to sum up the Red Book: It’s a basic cookbook with good techniques and basic recipes for standard dishes. Everything is very practical. The recipes are well-tested and are reliable.
Bibliography
Bittman M. How to Cook Everything: 2,000 simple recipes for great food. Tenth Anniv. Ed. Hoboken, NJ: John Wiley & Sons, Inc; 2008. ISBN: 978-0-7645-7865-6.